

Beaded Snakes: The Best DIY Fidget Toys We’ve Found
Do your kids like having something to fidget with as much as mine do? If so, making your own homemade DIY fidget toys is a fun family activity for a rainy afternoon or a day of summer camp at home. And if you already have kids’ crafting supplies, there’s a decent chance you might already have everything you need to make DIY fidget toys with household items. If not, the supplies you’ll need should be inexpensive and easy to get.
As the popularity of fidget spinners in recent years shows, many kids enjoy having something to play with in their hands – not just those with ADHD, on the autism spectrum, etc. And making your own DIY fidget toys can be a great afternoon activity when we’re all stuck at home this summer.
DIY fidget toys for ADHD and DIY sensory toys for autism have been staples on many families’ back-to-school lists for a long time:
- Not only are they fun to play with, they’re also fun to make.
- And twirling the beads in your fingers, rubbing it against your skin, or sliding them on the strings, do wonders to help overstimulated kiddos calm themselves and focus their attention when they need to.
Why ALL kids can benefit from fidget toys:
Moreover, with all the disruptions to learning in recent months, kids’ stress levels are through the roof. Which makes DIY fidget toys for anxiety a great stress-reliever for littles as school approaches again, and DIY fidget toys for school a must-have item on your kiddos’ supply lists.
Plus, lacing pony beads onto cord, string, or plastic lace is a great way for all kids to work on fine motor skills and concentration, while learning about colors and patterns.
After a week of “camp” at my mama’s house, my two girls have had lots of rainy afternoons to go crazy with all the pony beads and plastic lacing odds and ends I’d collected. And hands-down, their FAVORITE fidget toys from all their beading adventures have been the beaded “slither snakes” and the beaded “slider snakes.”
So I thought I’d share step-by-step instructions for how to make a beaded snake with you here, including ✅ several (free!) downloadable patterns for beaded snakes.
Easy-To-Make DIY Fidget Toys For School

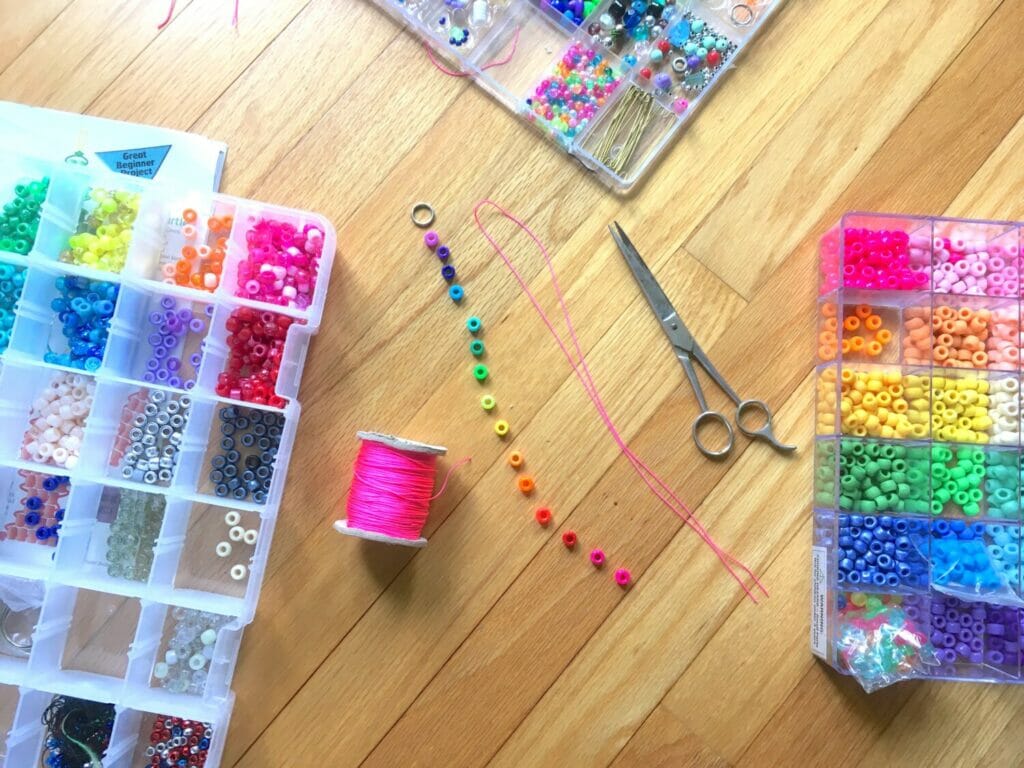
What you’ll need:
Must-have supplies:
- An assortment of ✅ basic pony beads. These beads usually come in plastic, and are great for even novice beaders because of their large holes. You can find them at discount department stores, craft-supply stores, or online. But to be honest, I’ve collected most of ours from thrift stores and consignment sales.
- Some kind of ✅ craft-quality cord or string (non-elastic) that won’t fray easily when you repeatedly thread it through other items. (Embroidery floss could work if you use a plastic needle, but otherwise the ends will fray too easily as you work with it. And regular sewing thread isn’t heavy-duty enough.)
- Scissors (for cutting your cord/string) and a ruler (for measuring out how much string/cord you’ll need) are also helpful.
Optional, but nice to have:
- ✅ Plastic lacing, which is much easier for some kids to handle than regular string when it comes to beading projects. While it won’t work with the “slider” snakes, it can make stringing the “slither” snakes much easier for little hands. You can find this at crafting stores or online, and sometimes at thrift stores (especially those focused on crafting supplies).
- ✅ Keychain rings and/or ✅ lobster-claw clasps. These make your snakes easier to attach to a backpack, so they’re ready to go for school. While you could use lanyard clips, I personally don’t like these for something you’ll be clipping onto a backpack, as they aren’t as strong. You can find these at craft-supply stores, but you can get a lot more bang for your buck if you order them in bulk online.
- ✅ Large-eye blunt needles (plastic if you have younger kids). If you’re using string or cord, these can really help kids with less-developed motor skills be able to complete beading projects more easily.
How to Make a Baby Slider Snake


This is a good first project for anyone who’s never done a beading project before. You’ll get to practice all the basic techniques you’ll use for the larger beaded slither snake and beaded slider snake as you make it.
Why do I call it a “slider snake”? Because you can slide the beads back and forth when you’re done.
- You can therefore use these beads for counting as well – whether for basic single-digit math practice, or anything else you’d like your kids to count or track.
- For those of you who want to teach your children to count prayers or blessings, this project can also double as a first set of prayer-counting or blessing-counting beads.
Supplies you’ll need for a baby slider snake
- 10-15 pony beads in whatever colors you choose – I decided to make this one in a rainbow pattern.
- Approx. 2 ft (24 in/60 cm) cord or string.
- Something to use as an anchor – a keychain ring (split ring), lanyard clip, lobster-claw clasp, etc. In a pinch you could even use a large button or the eye of a safety pin. I used a small split ring on this one.
Step-by-step Beaded Baby Slider Snake instructions:
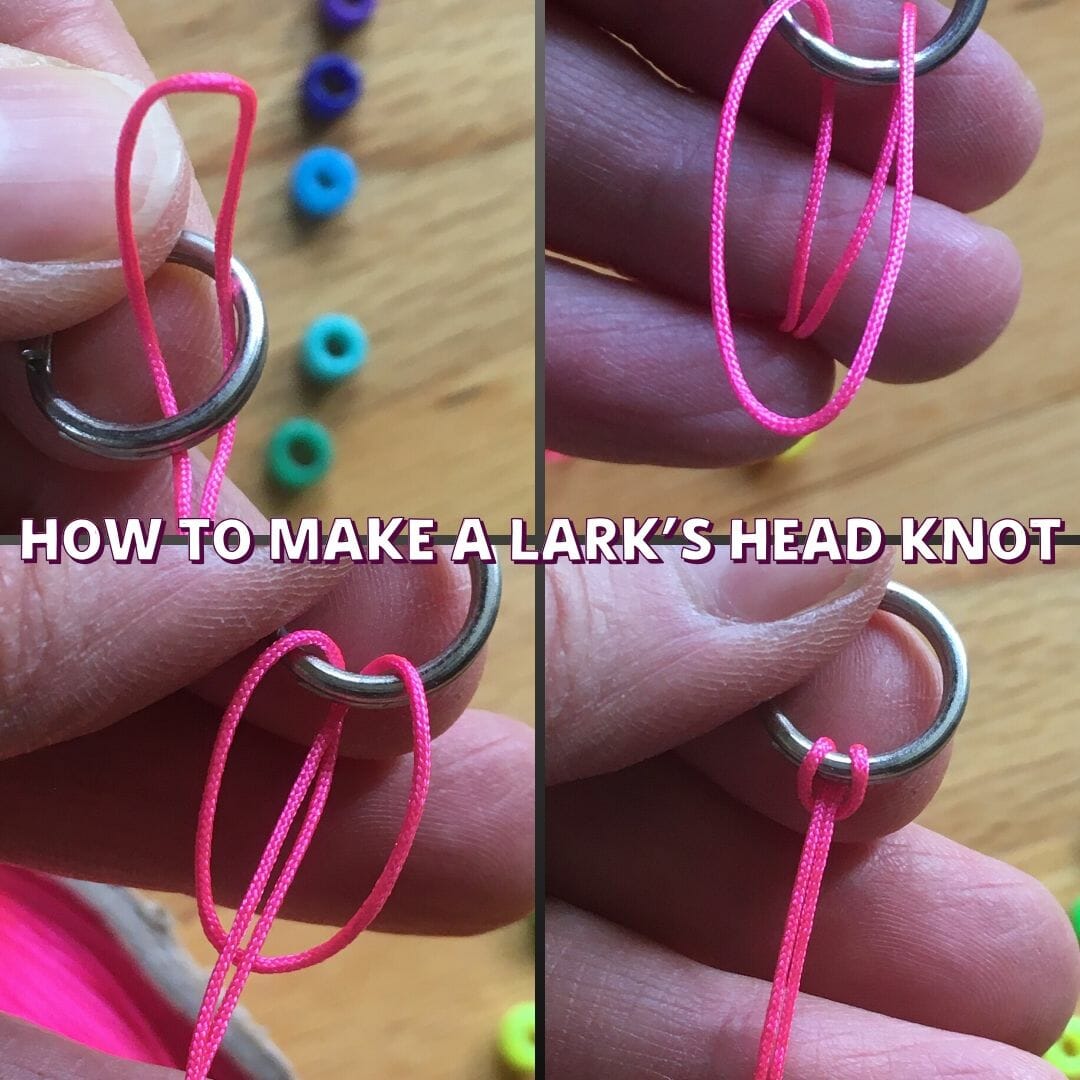
First you need to make a lark’s head knot:
Fold your cord in half to make a loop at the middle of your cord, and use a lark’s head knot to secure your cord to your anchor.
- To make a lark’s head knot, push the loop through the center of your split ring or other anchor object.
- Pull it down to make a large loop over the tail-ends of your string.
- Pull the tail-ends through the loop, and pull tight.
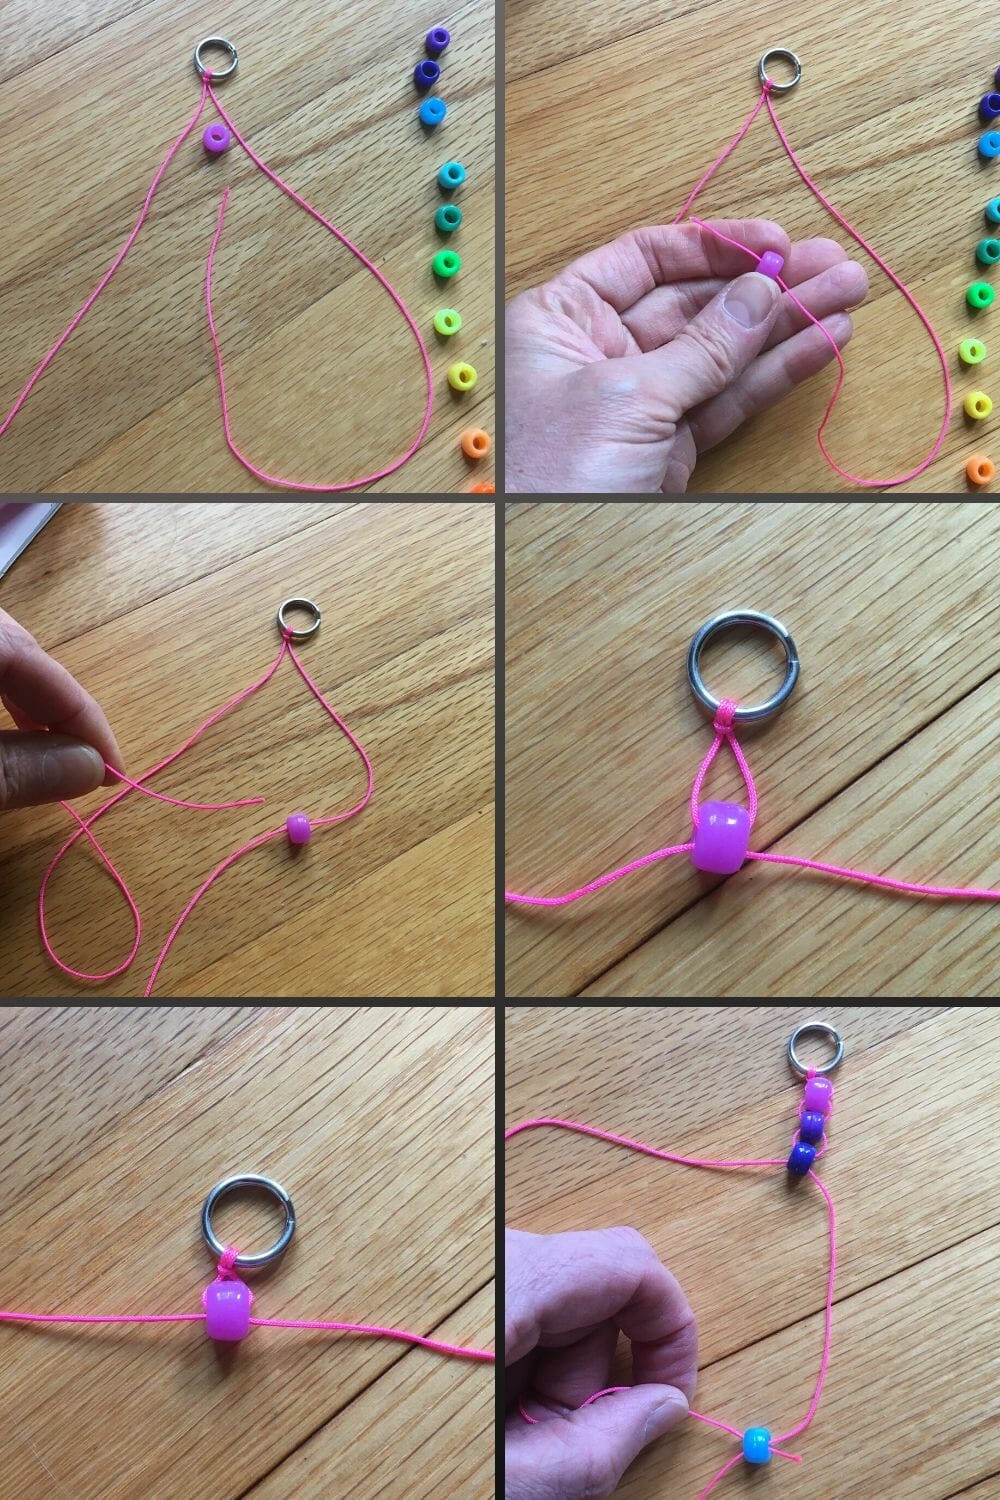
Now you’re ready to start beading!
- Lay out your beads in order. (If you have a piece of felt or a felt tray to put them on, that will keep them from rolling around. Otherwise, this is a good project for a corner of floor by a window, which is where the girls and I worked at my mama’s house.)
- Lay out the two tail-ends of your anchored cord so it’s easy to tell which end is on your left, and which end is on your right. Pick up your first bead, and slide the right-side tail through the hole first, pushing it through from right side to left side. Then slide the left-side tail THROUGH THE HOLE IN THE OPPOSITE DIRECTION (in other words, into the side that the other tail just came out of, and out of the side that the other tail started on). By now, the piece of cord that was on the right side at first should be sticking out the left side of the bead, and the piece of cord that started on the left side should be sticking out the right side of the bead.
- Pull the two ends of cord tight so the bead slides up next to the anchor. Pick up your next bead and put the new right-side tail through the bead from right to left, then the new left-side tail through in the opposite direction (left to right). Pull tight again.
- Repeat with all remaining beads in your pattern.

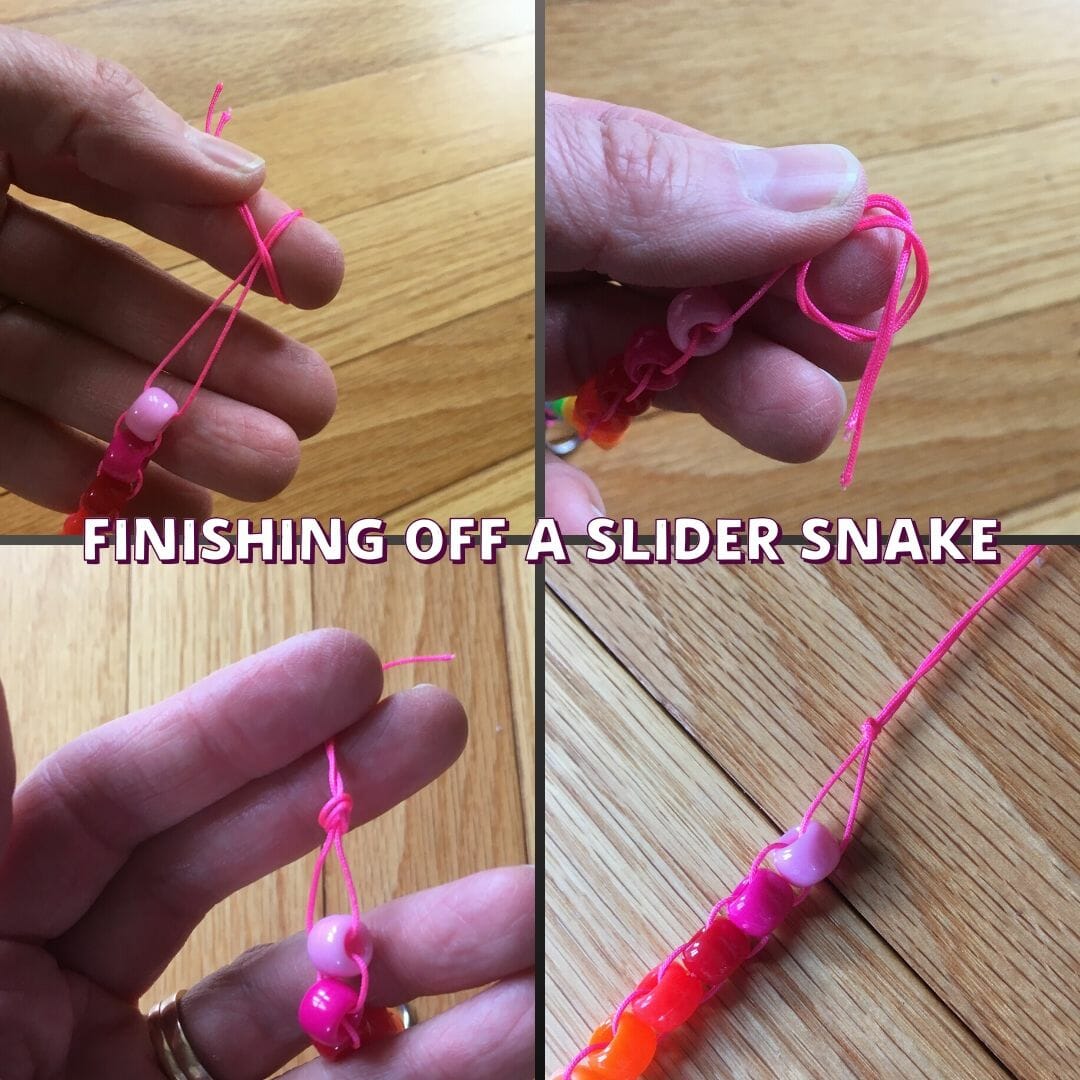
Once you’ve added all your beads, you need to know how to finish your slider snake:
If you want to be able to slide the rows on your snake back and forth, then you need to leave a little extra space at the end of your snake, before you knot off your cords.
You can use whatever kind of knot you like, so long as it stays tight. For beaded projects where I want to leave that extra space for sliding, I find it easiest to wrap the two cords around my finger, take the loop off my finger, push the ends through the loop, and then pull them tight – so that the knot is secure, but there’s still some distance between the knot and your final beaded row.
How to make a full-sized slider snake
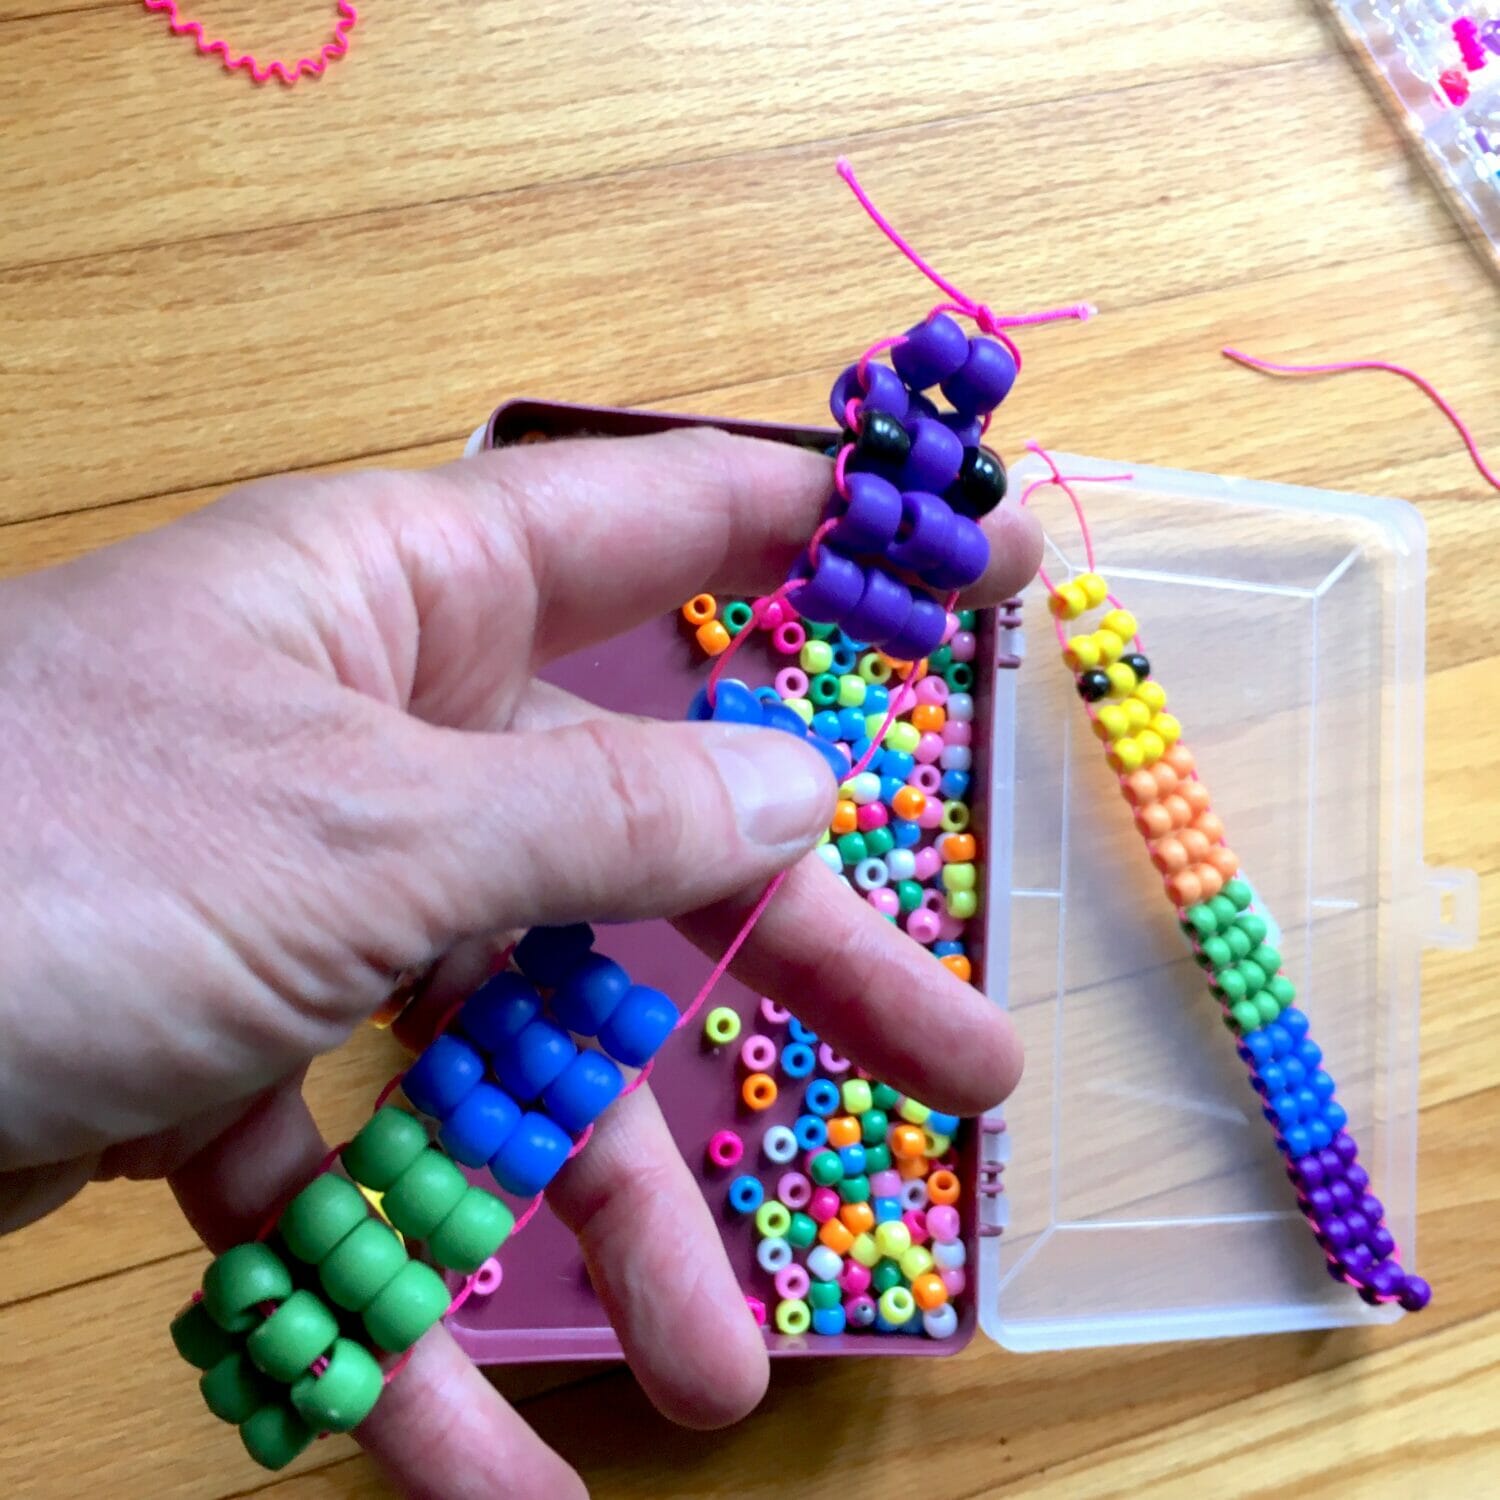
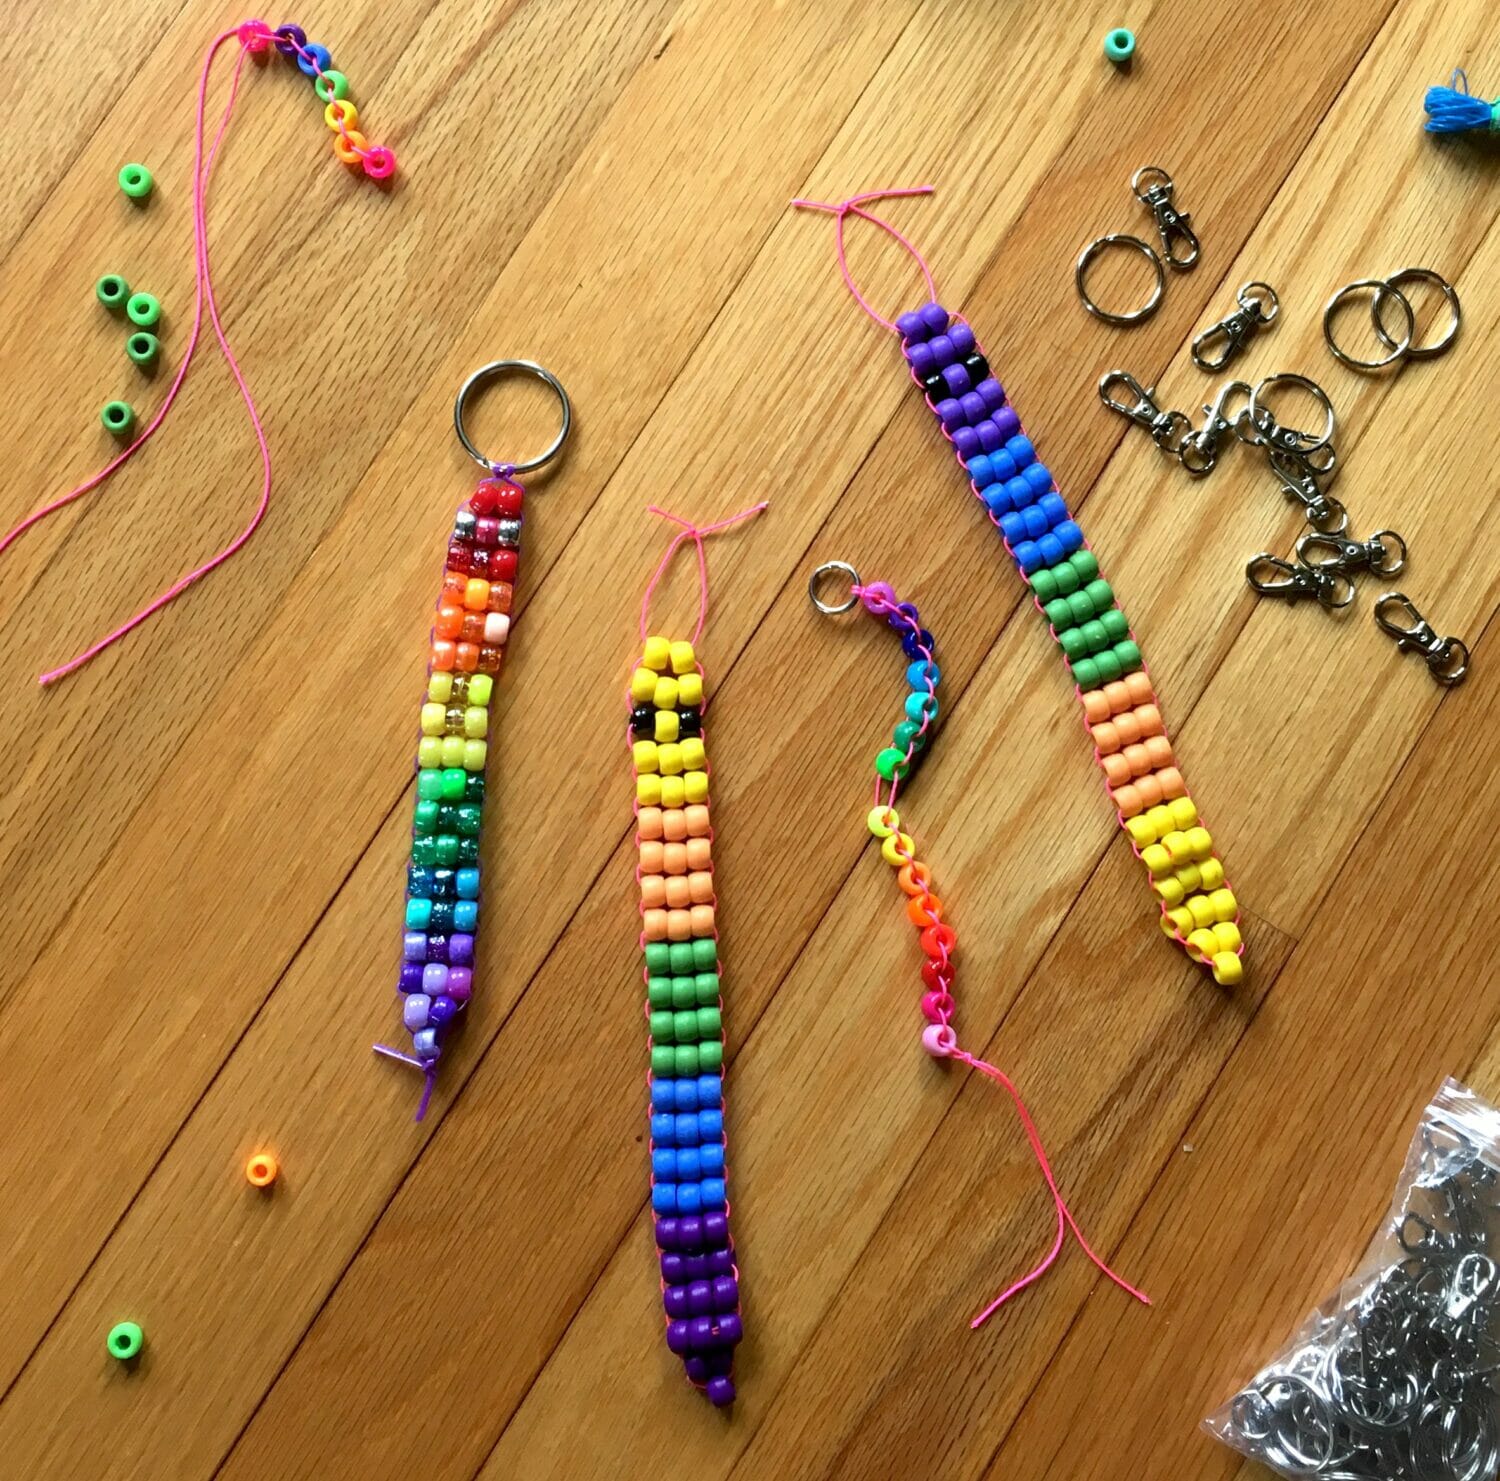
These are the two full-sized slider snakes that Kimmie made for herself and Essie. Sliding rows of 3 beads back and forth, one row at a time, is oddly satisfying – making these beaded snakes the perfect DIY fidget toys for adults and kids alike. The basic techniques are the same as what I described above for the baby slider snake; you’ll just need more beads.
These bigger slider snakes have 23 rows/65 beads total. You can make them with blocks of color, as you see here – or with a single stripe down the back – or with alternating skinny stripes – or whatever you like. (Note that two of your beads should be a different color, for the eyes.)
For plenty of fun pattern ideas for these beaded snakes, as well as printable patterns you can CUSTOMIZE to make your own color combinations, ✅ click here to access my FREE beaded snake pattern files!
And unlike the baby slider snake, you can get away without an anchor keyring or clip on this snake. If you decide to skip the anchor, then start at the tail end of the snake instead of the head.
Supplies you’ll need for a full-sized slider snake
- 65 pony beads total – 2 for eyes, and 63 in whatever other color combination you choose.
- Approx. 5-6 ft (60-72 in/120-150 cm) cord or string.
- OPTIONAL: Something to use as an anchor – a keychain ring (split ring), lanyard clip, lobster-claw clasp, etc. If you don’t have (or want to use) something for an anchor, just start making the snake at the tail-end instead of the head-end.
Step-by-step Beaded Slider Snake instructions:
- If you’re using something as an anchor, secure your cord to it using a lark’s head knot, as described above.
- Starting at the head end, lay out your beads, in order from head to tail, as follows:
- Row 1: 2 beads
- Row 2: 3 beads
- Row 3: 3 beads – 1st and 3rd (eyes) different color than center bead
- Rows 4-21: 3 beads each
- Row 22: 2 beads
- Row 23: 1 bead
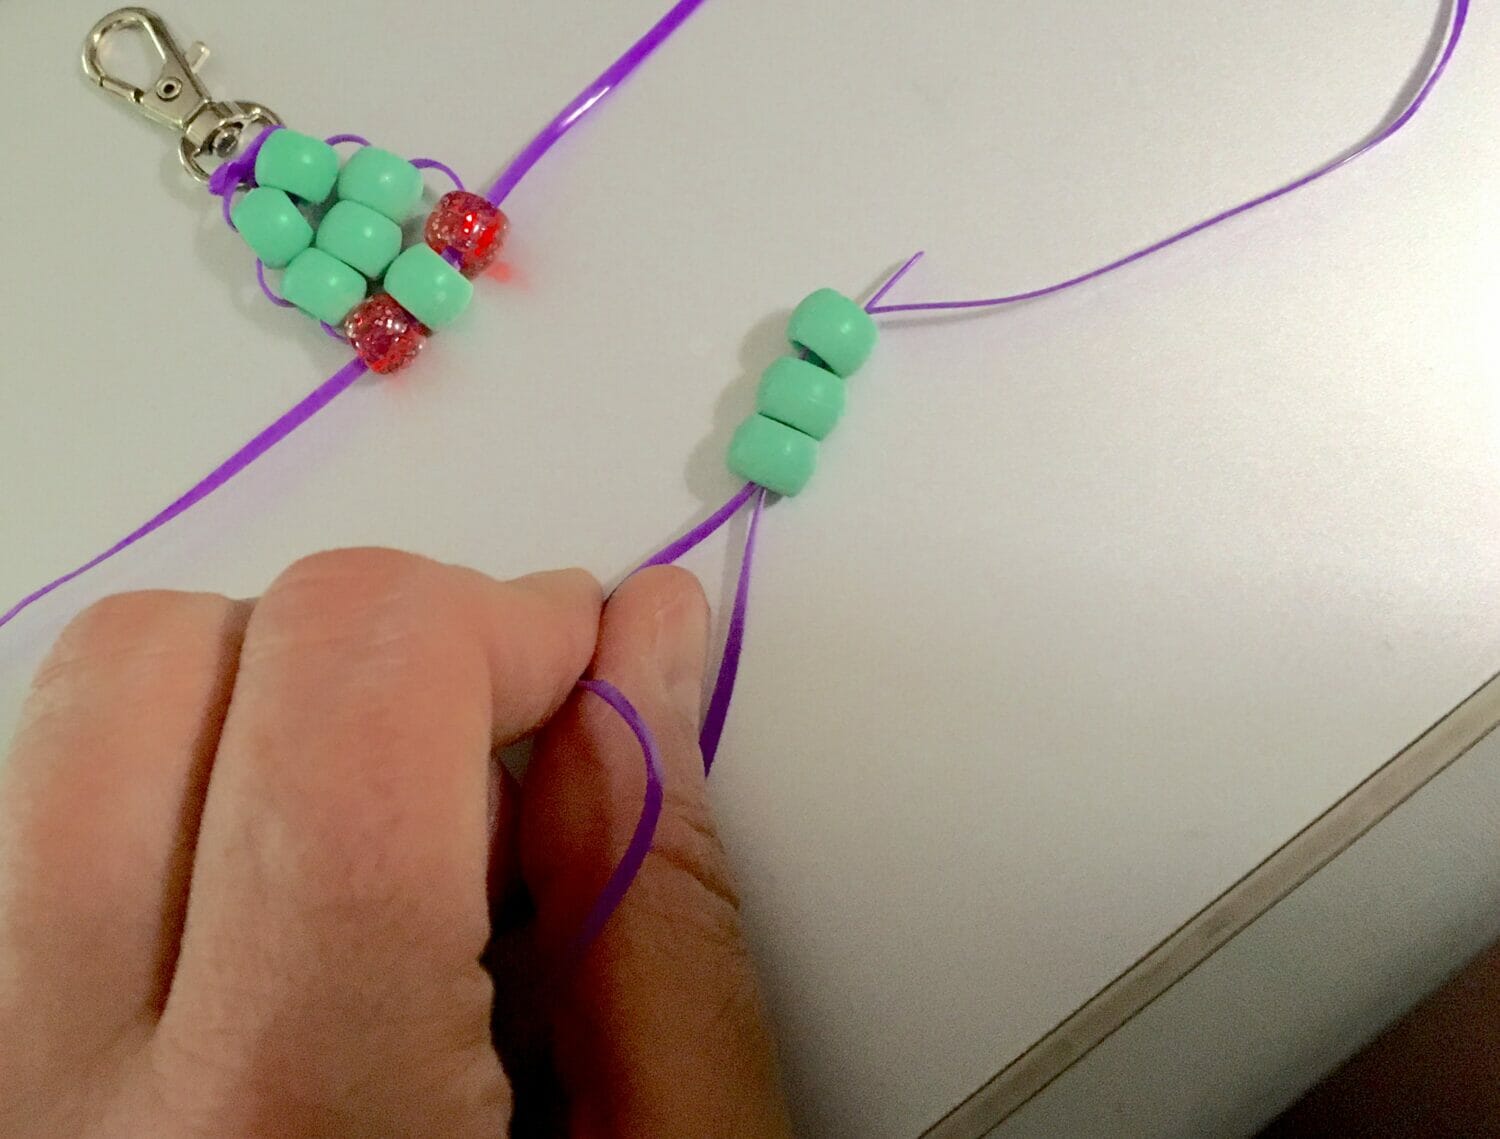
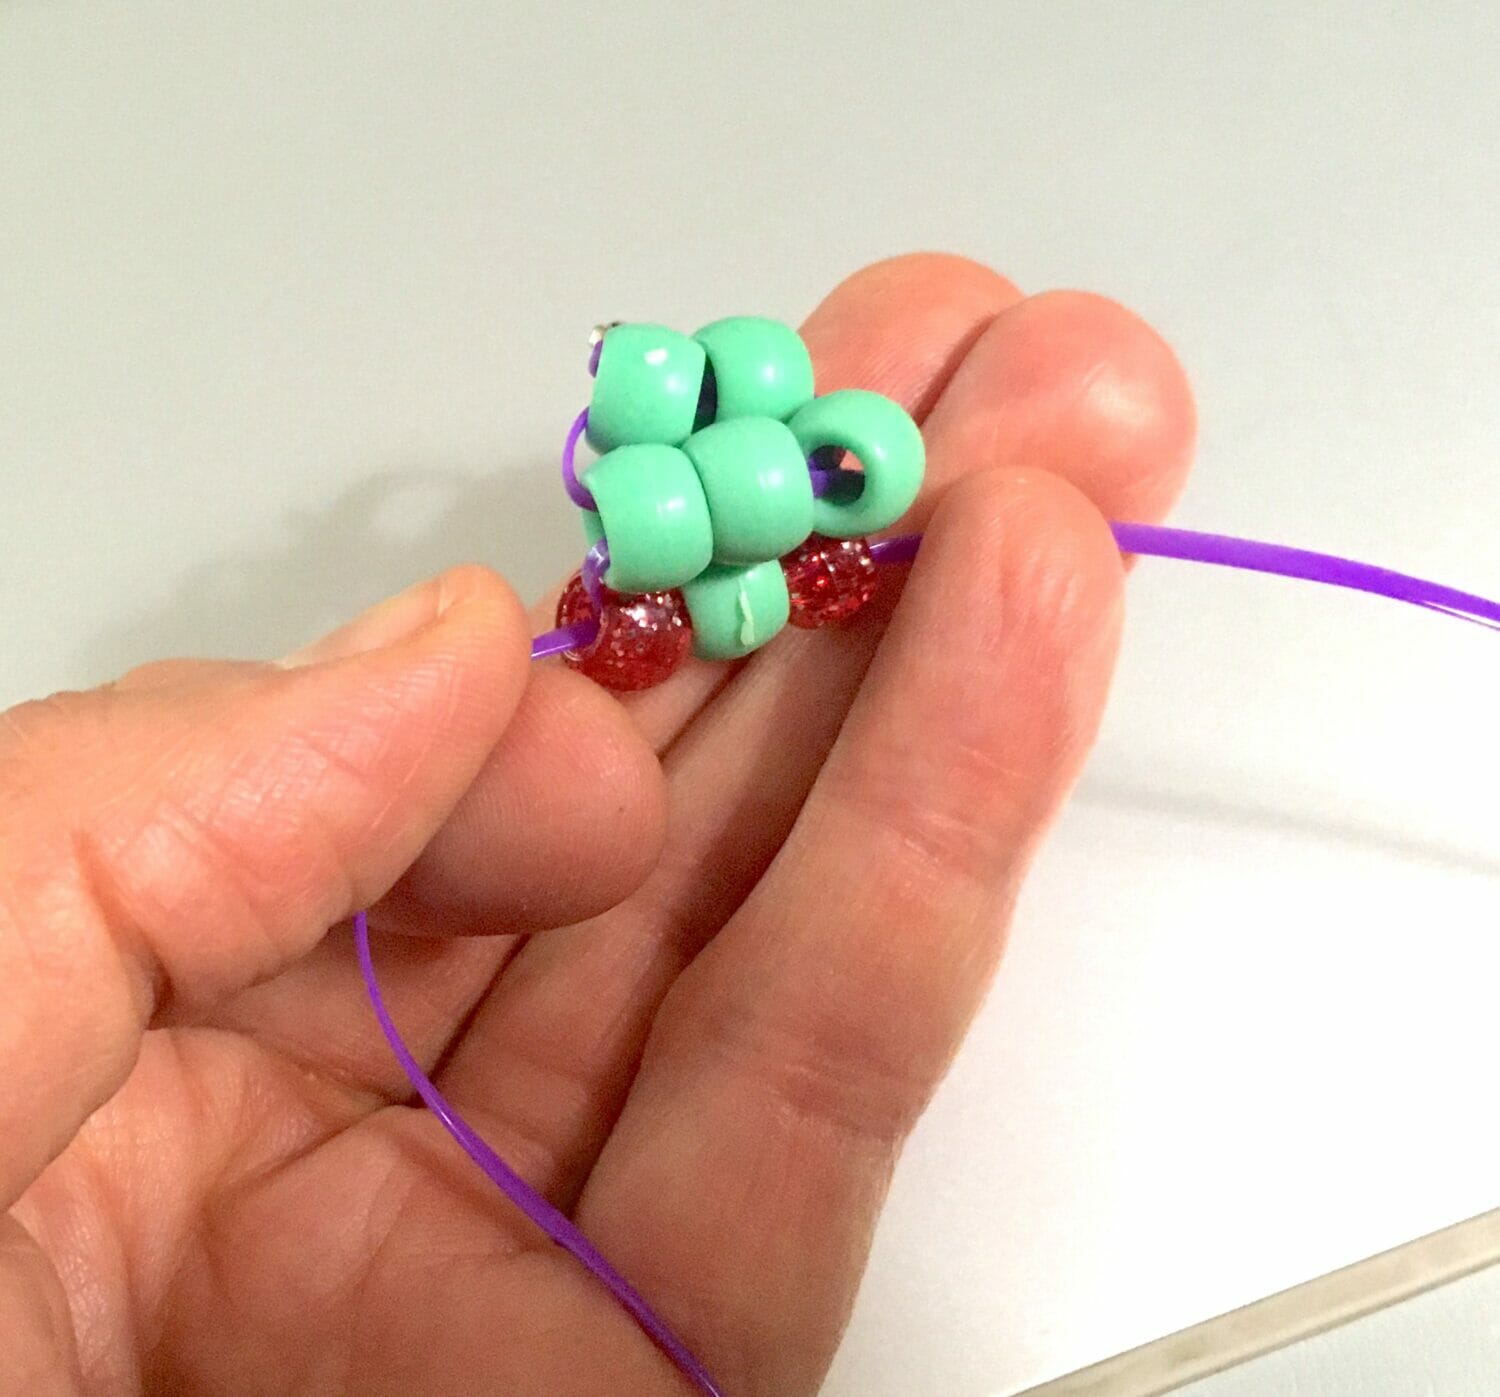
- Add beads one row at a time, just as for the baby slider snake. Instead of putting one bead in each row, you’ll put the right-hand tail through ALL the beads in each row, then put the left-hand tail through ALL the beads in the row, then pull strings so row is snug against the previous row, then repeat until you’ve added all rows.
- Finish off with a space at the end (approx 1 in between last row of beads and knot), as shown above under baby slider snake.
- If you’re NOT using something as an anchor, lay out your beads with the tail end (1 bead) first and add rows in the opposite order. Finish off the same way as for the other slider snakes.
How to make a full-sized slither snake
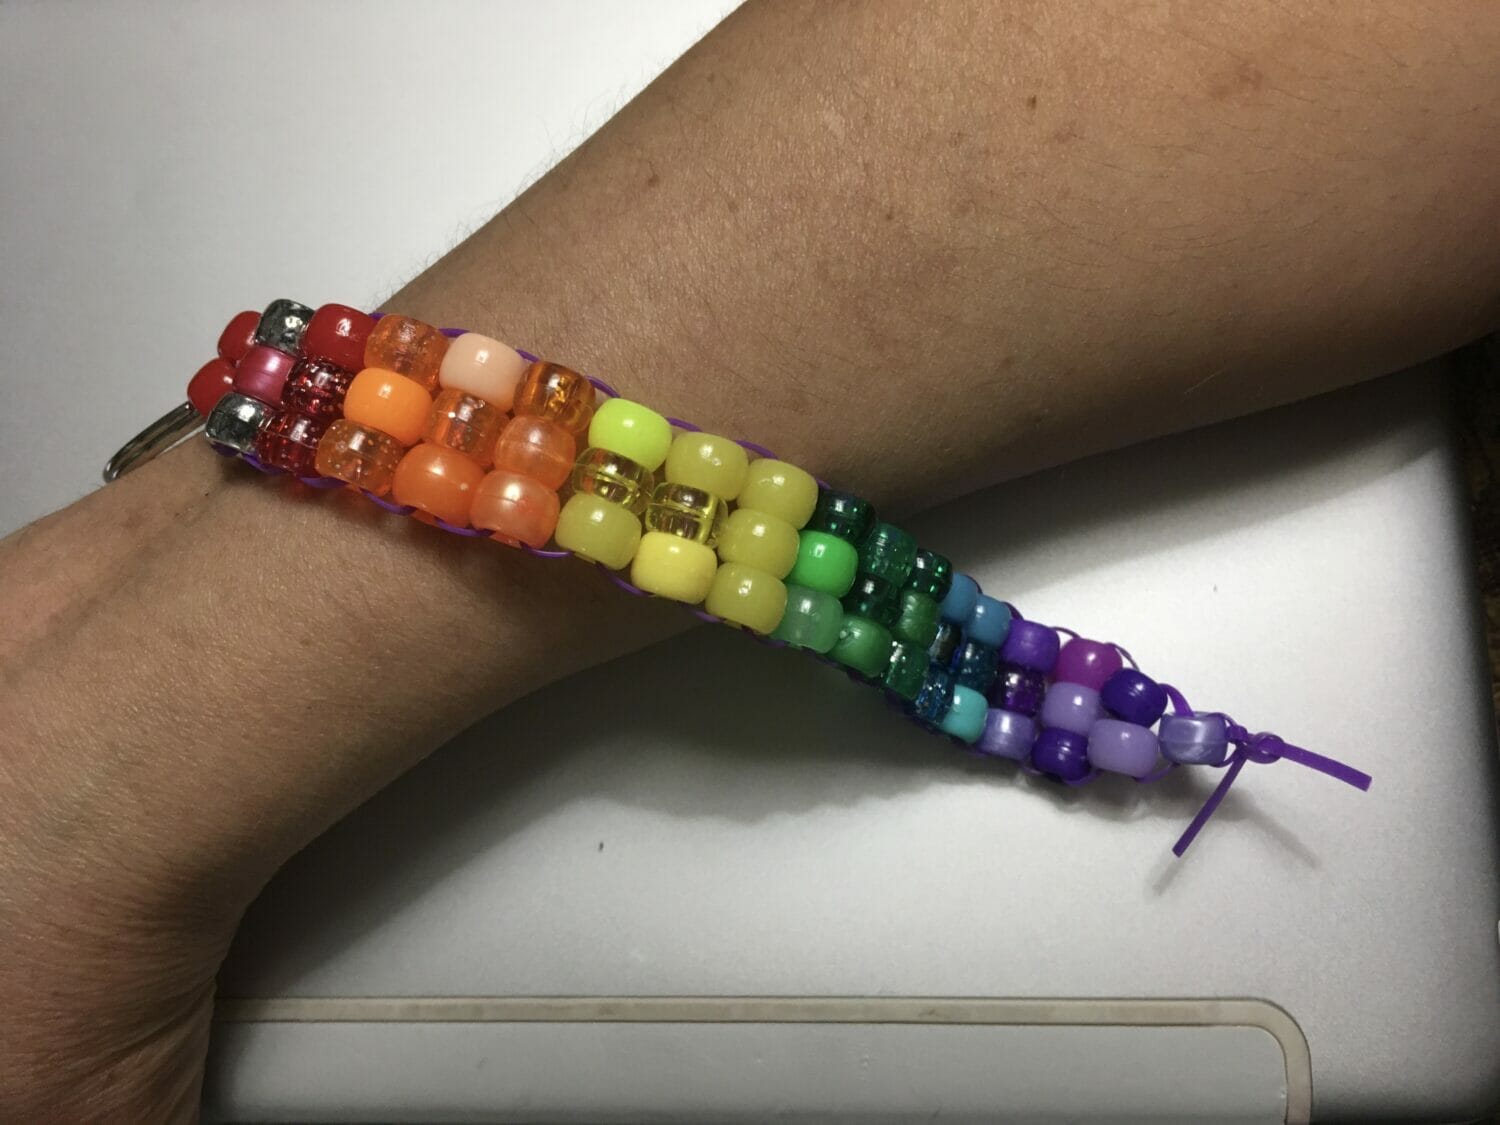

Unlike the slider snakes described above, the rows on slither snakes don’t slide back and forth; they’re fixed. That makes these snakes perfect for twirling the beads between your fingers, rolling your hands across the rows (great for a mini-massage if your hand hurts from too much writing!), or slithering across your arm or leg.
Also, because these beads DON’T slide up and down by rows, this project is perfect for some plastic lacing or other plastic beading string, if you have some. Using plastic lacing is much easier for littler hands and less-experienced beaders, as the beads won’t slide around so much while you’re trying to form the rows.
Supplies you’ll need for a full-sized slither snake
- 65 pony beads total – 2 for eyes, and 63 in whatever other color combination you choose
- Approx. 5-6 ft (60-72 in/120-150 cm) plastic lacing/plastic beading cord (regular cord or string, or even fishing line, will also work, but will be harder for little hands to manage successfully)
- OPTIONAL: Something to use as an anchor – a keychain ring (split ring), lanyard clip, lobster-claw clasp, etc. If you don’t have (or want to use) something for an anchor, just start making the snake at the tail-end instead of the head-end.
Step-by-step Beaded Slither Snake instructions:
- If you’re using something as an anchor, secure your cord to it using a lark’s head knot, as described above.
- Starting at the head end, lay out your beads, in order from head to tail, as follows:
- Row 1: 2 beads
- Row 2: 3 beads
- Row 3: 3 beads – 1st and 3rd (eyes) different color than center bead
- Rows 4-21: 3 beads each
- Row 22: 2 beads
- Row 23: 1 bead
- Add beads one row at a time, just as for the baby slider snake. Instead of putting one bead in each row, you’ll put the right-hand tail through ALL the beads in each row, then put the left-hand tail through ALL the beads in the row, then pull strings so row is snug against the previous row, then repeat until you’ve added all rows.


- After you’ve added your final row of beads, tie several overhand knots, close to the last row of beads, to secure them. Trim tails as desired.
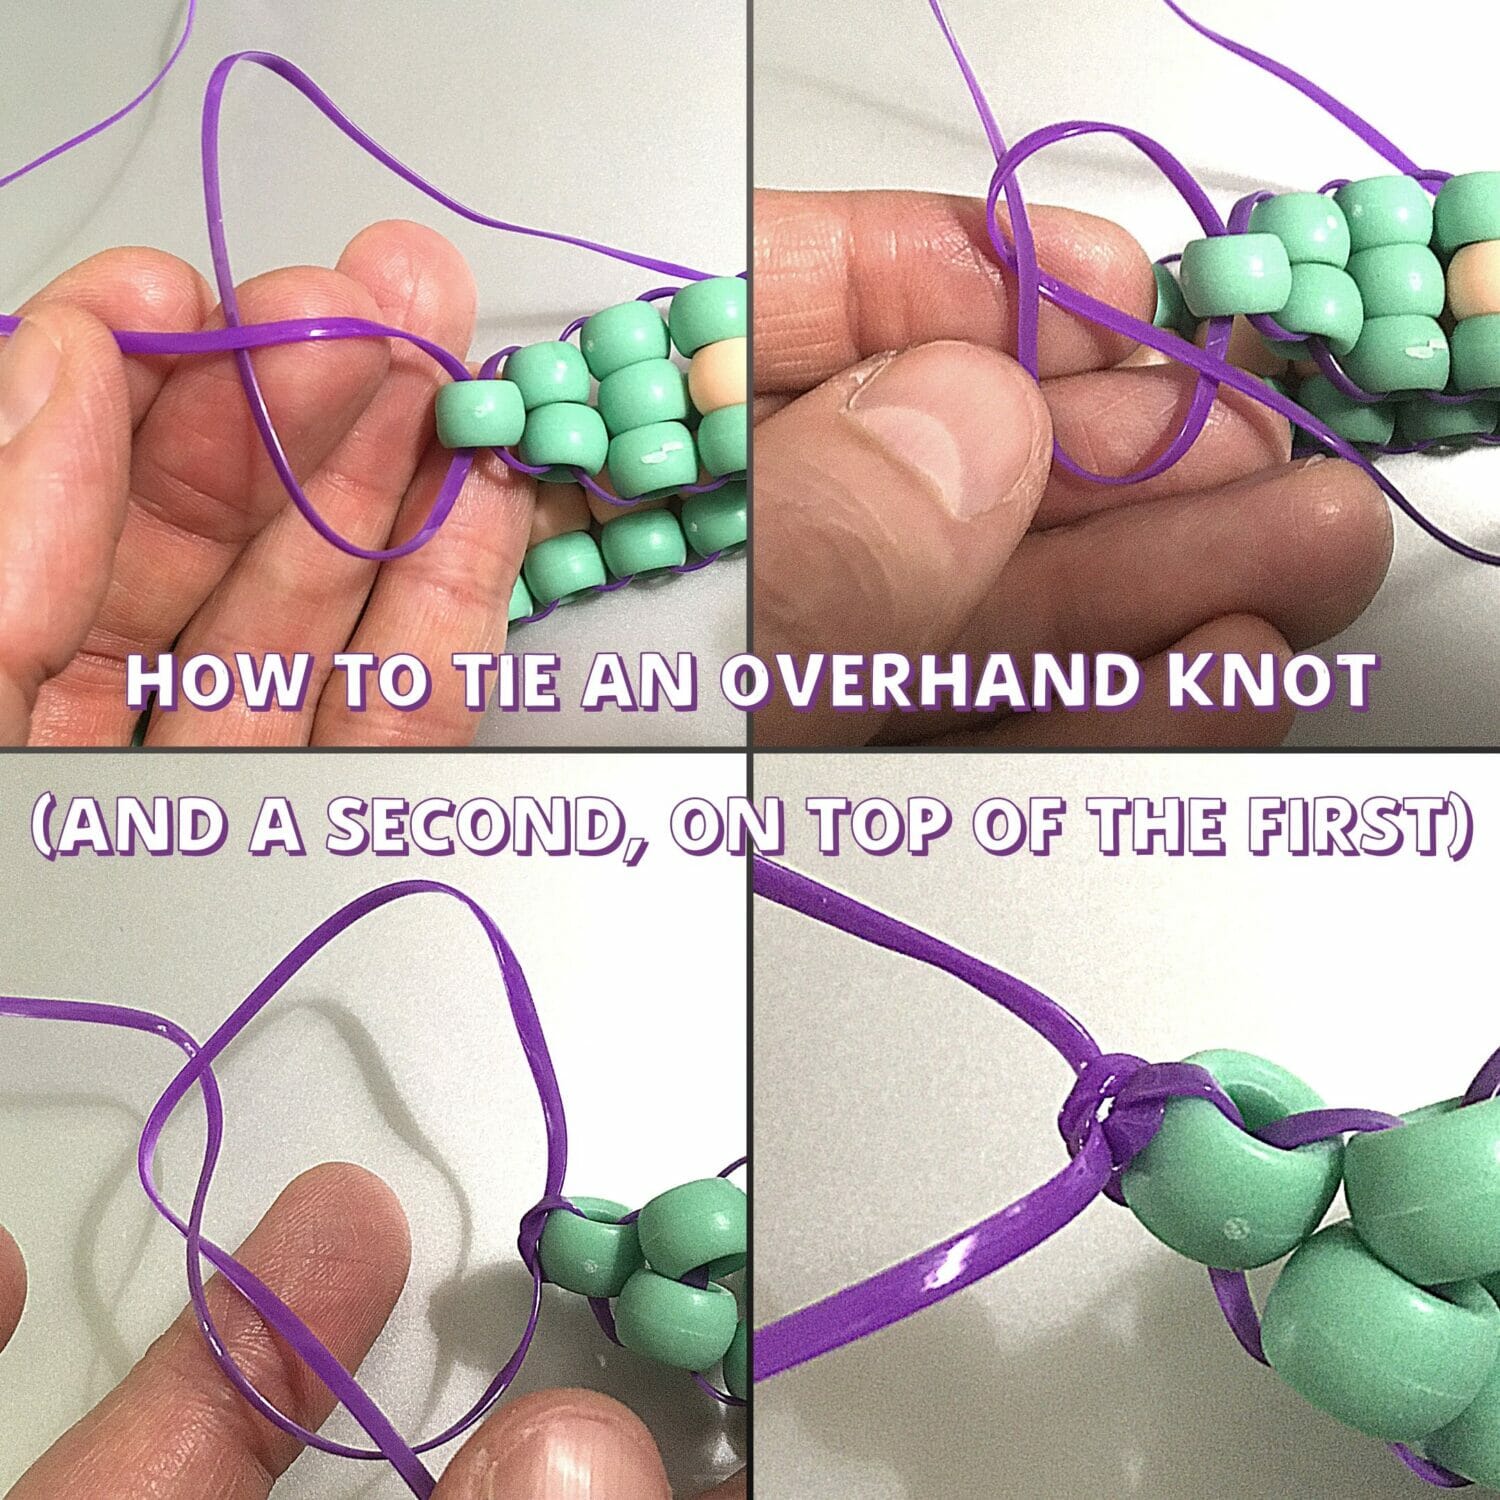
- If you’re NOT using something as an anchor, lay out your beads with the tail end (1 bead) first, and add rows in the opposite order. Finish off with several overhand knots tied snugly against the last row of beads.
Have you and your kids made fidget toys for school before? What are your family’s favorite DIY fidget toys? Let us know in the comments!
And don’t forget, you can download your FREE DIY fidget snake pattern files by filling out this form:
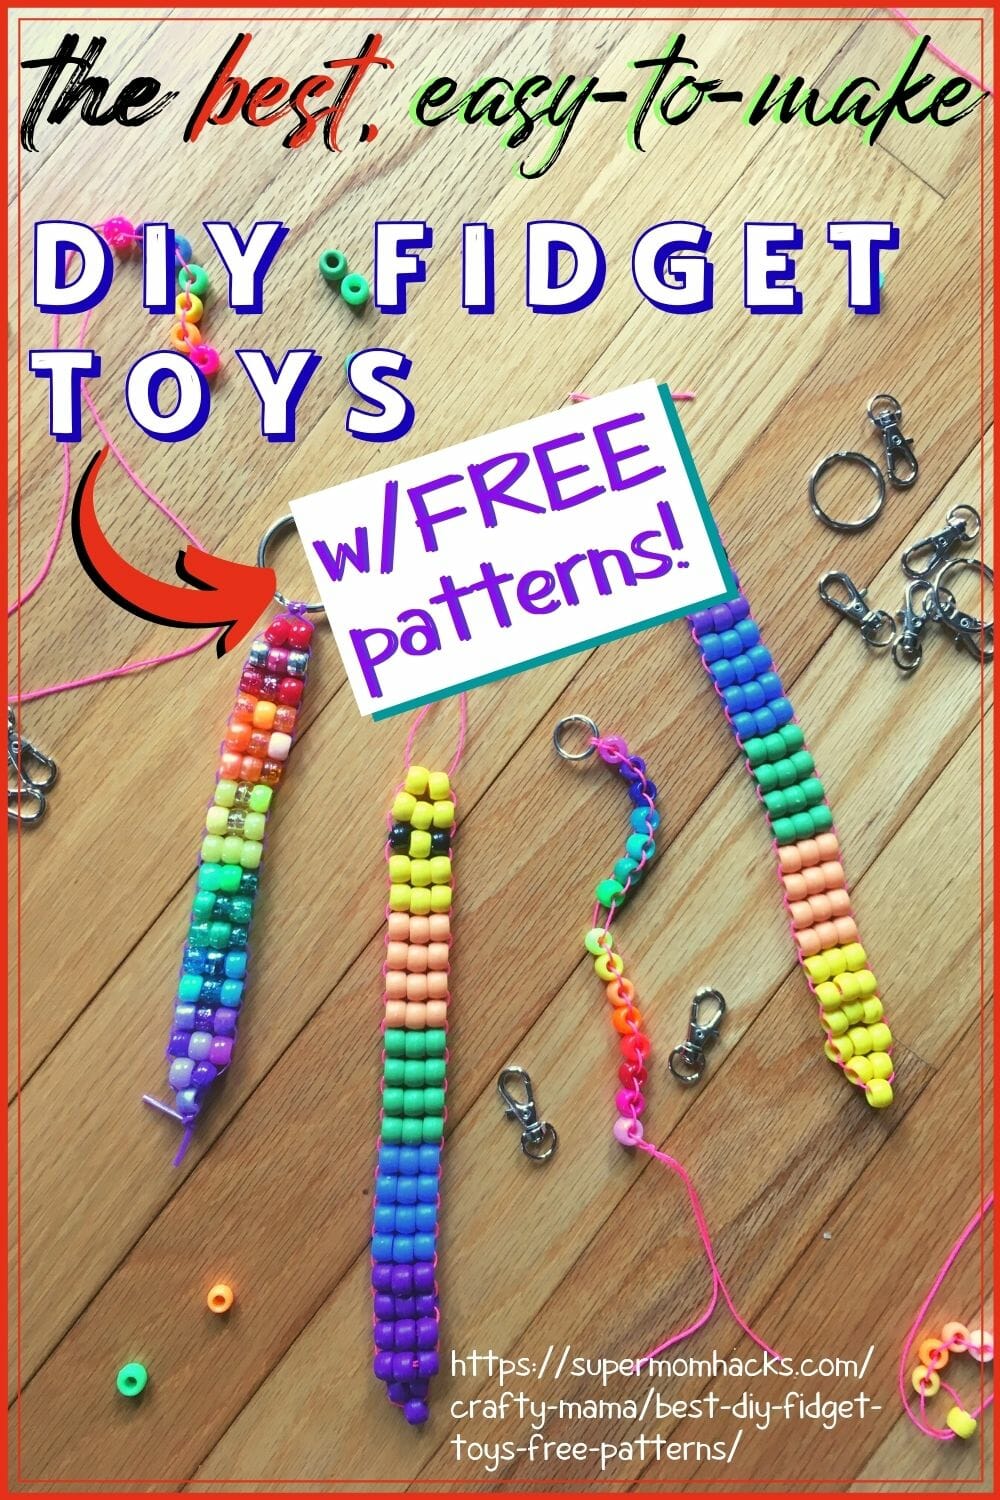
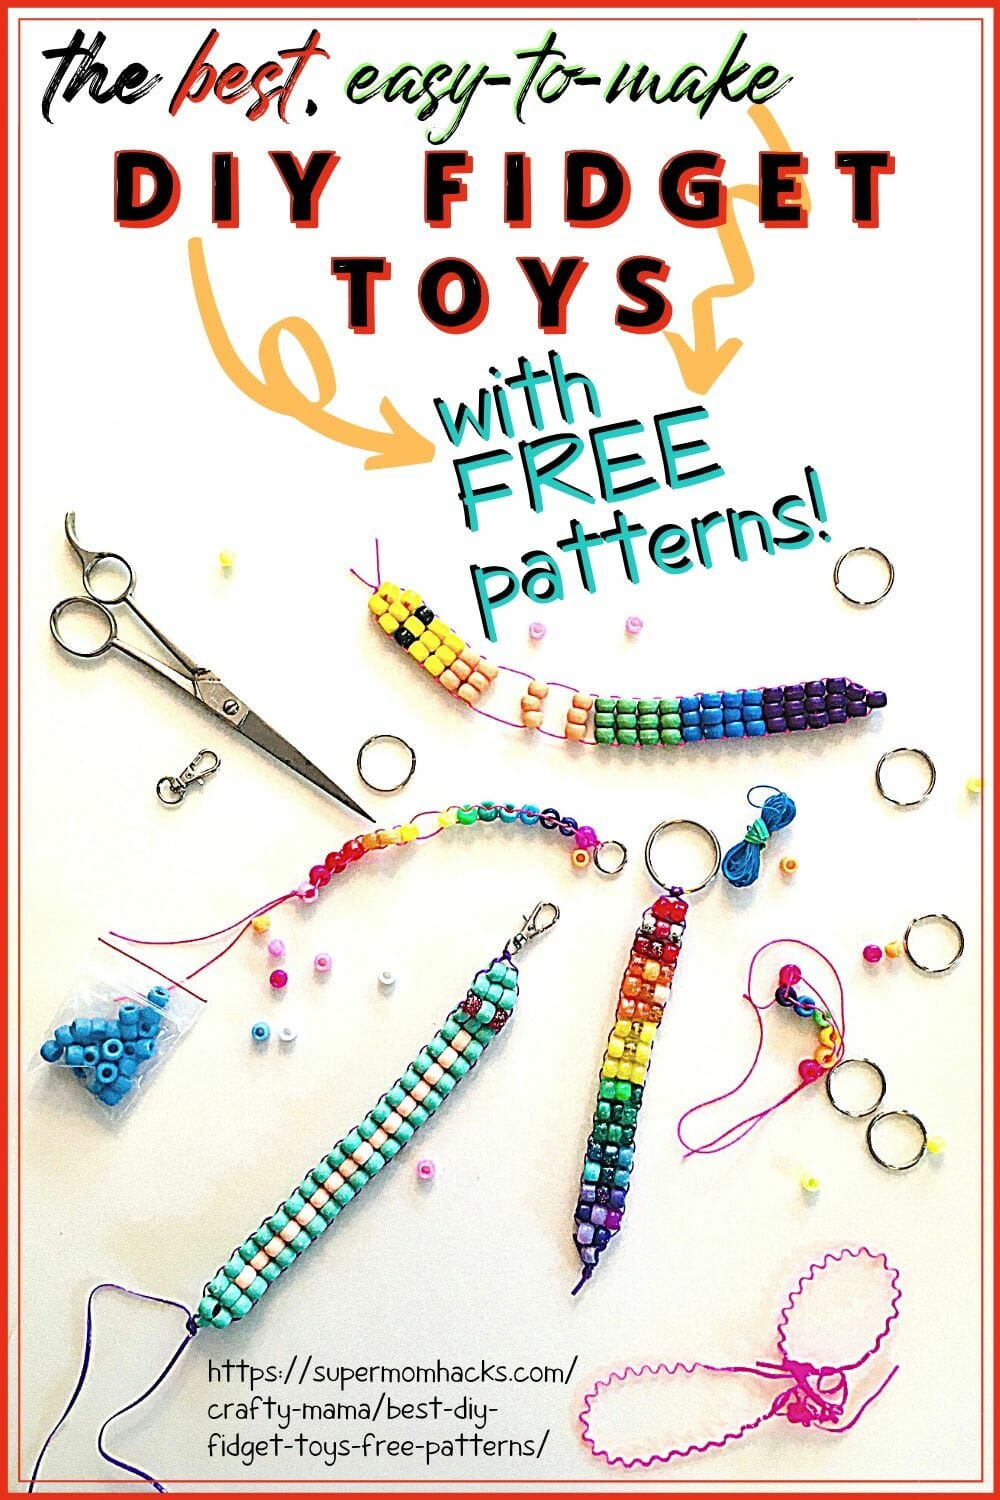
If you liked these step-by-step directions for the best DIY fidget toys we’ve found, please share by pinning this image!

NOTE: This site contains affiliate links. I may earn a small commission from any purchases made through affiliate links, at no additional cost to you. For more information, please read the full disclosure/privacy policy.
Follow Super Mom Hacks on Facebook, Instagram, Pinterest, and Twitter!
Or stay in the loop by ✅ joining our mailing list!

